Monday, June 28, 2010

Chicago Out of Town Welcome Basket- the ingredients


Kate Parker Weddings Chicago Welcome Basket

We love making custom wedding welcome baskets for clients across the country and this past week we put together and shipped 25 baskets for a client getting married in Chicago! I wanted to show you the finished product and some some of the fantastic items that filled it!

garret popcorn Kate Parker Weddings welcome basket

First, this is the BEST caramel popcorn I've ever had in my life... In fact, we over ordered purposefully and we have a giant metal bucket full of this stuff in our office. Check out all of the amazing products Garrett Popcorn has to offer- a staple for a Chicago welcome basket.

Kate Parker Wedding Metropolis coffee chicago welcome basket

When we started designing our line of out of town welcome baskets I knew I wanted a great coffee or tea in each of them.... we tried many many different companies and varieties and out of every city and state basket we offer, Metropolis Coffee is by far the best coffee I've ever tasted... great people to work with, great packaging, great all around and the coffee is amazing!!!

Kate Parker Weddings custom welcome map

Finally, we always have a custom welcome map in each of our baskets which includes 5 points of interest of your choice. We used to have a graphic designer in our office so we were able to produce these on our own... Now that we don't have a graphic designer, I attempted to make the map on myself before quickly realizing I was way over my head in Adobe Illustrator and I had to call upon an expert to help finish the project... enter Gus and Ruby Letterpress.... Whitney and Sam graciously moved a few things around for us last week to tidy up and beautify this custom map for Maria and Sam! Thank goodness too, there's looks SO much cuter than mine did :)

There you have it, adding personalized and hand-selected products in our welcome baskets is one of the main reasons ours stand out. We think they're pretty well designed too, if we can say so ourselves! Happy planning! KP

To learn more about our line of Out of Town Welcome Baskets, check out our website! We always make new custom baskets for any city/state/wedding destination!

Wednesday, June 16, 2010

Getting your marriage license in New England

marriage license


Now I don't want to throw any of my past clients under the bus, so I won't mention any names in this brief but very important post. I have had more than one client come to me the week or so before their wedding asking if they need to get a marriage license in order to get married. Perhaps I'm assuming people are more aware of their responsibilities than they actually are, but I'm writing this to tell you one thing YOU, the people getting married, are responsible for:

1. A marriage license. You can't just say you're married and it's official. Check with the state you're getting married in to find out their specific requirements. Every license has a small fee and some require blood tests, birth certificates, etc. Your wedding planner can't get your license for you, and it's literally the only legal document and most important part of getting married....

For our New England clients, here is a list of website for each state and their marriage license requirements to make it a bit easier for you:


For those reading this blog getting married outside of New England, here's the link to the entire list:

US Marriage Laws

Tuesday, June 8, 2010

DIY- Tissue Paper Flowers

We have SUCH a fun rehearsal dinner/welcome BBQ for this weekend's wedding! One of our DIY projects for the event was making 200 over-sized tissue paper flowers to fill mason jars down the length of 8' banquet tables. This project TOTALLY brought me back to my 7th grade semi-formal where we made 1000 tissue paper flowers and hung them from the ceiling of the gym to recreate a 1950's prom theme. What's slightly more comical is that three of my male music major college graduates made the flowers for me this week and we wanted to share with you how to make them!

1. Select your tissue paper colors. We went with a multi-colored theme of royal blue, orange, pink, and purple.

2. Decide on the size of your tissue flowers. We took a 20" x 36" tissue paper sheet and cut it down the middle, length wise, creating two 10" x 36" long strips of tissue paper.

IMG_1267

3. Decide on the scale of your flowers. We used 5 sheets of tissue paper per flower.

IMG_1266

4. Fold the paper "petals". Folding back and forth, create a set of equal pleats down the entire length of your tissue paper strip.

IMG_1268

IMG_1269

5. Cinch the pleated paper in the middle of the strip. Using a pipe cleaner, twist tie, or wire of any kind, grab the center of your pleated strip and twist your wire until it's tight and you have a clear center.

IMG_1271

IMG_1272

IMG_1273

6. GENTLY unpleat each of your tissue paper sheets. Start on one side and work your way to the other side of the flower. Try to get the paper as open and separated as possible, especially as you get close to the wire twist in the middle of the flower. The more tissue you can open up the more full your flower will look.


IMG_1275

IMG_1276


7. You have one completed tissue flower! You can add a stem using a pipe cleaner if you'd like, or make a full bouquet of these flowers! Enjoy the project!


IMG_1279

IMG_1278

KP

Sunday, June 6, 2010

Destination Weddings- things to consider

myKPW

Since we plan mostly New England weddings, with many of our clients coming from CA and NY, I thought I would mention a few of the things you should really consider when having a destination wedding.

The first is what actually defines a "destination wedding". In our opinion, any wedding that asks more than 50% of your guests to drive more than 3 hours in one direction is a destination wedding. Because of the distance, a significant amount of your guests will need to make travel plans which is one of the reasons a destination wedding requires more preparation.

In general, the most important thing to consider when planning a destination wedding is TIME. If you plan ahead you can reserve everything you need to reserve and you can communicate the appropriate information to ease the travel planning process for your guests.

Many couples plan their destination weddings around their guests' experience. They want to make things as easy as possible in terms of their guests' travel plans, and they want to provide as much information and activities for everyone to enjoy once they arrive for the wedding.

1. Overnight accommodations- we did just write about this and you can read the details here, but make sure you offer different price point options and room blocks if you can.

2. Transportation- if your wedding is in a remote location in general, and/or if your ceremony and reception are in two separate locations, consider offering transportation for your guests from their hotels to your ceremony and reception.

3. Save The Dates- creating a Save the Date is a major piece of the destination wedding puzzle. You can include as much information as you'd like in your Save the Date, including the wedding weekend schedule and accommodation and transportation information. Getting a Save the Date out to your guests at least 6 months before your wedding date gives them time to make the appropriate travel arrangements, as well as requesting any work days off for your wedding.

4. Wedding Website- in addition to your Save the Date, consider creating a wedding website to provide even more details about your wedding plans. This can include things to do for the weekend, specifically planned activities,- golf outings, tennis, kayaking, etc. and any additional accommodation or transportation information you didn't include in your printed Save the Date.

5. Welcome Baskets- yes, we make adorable out of town welcome baskets, but they really serve an important purpose. We try to fill them with local goodies and amenities for guests to enjoy but we ALWAYS include a local chamber of commerce map as well as a welcome letter from our clients and any additional schedule or itinerary they want to include. Something to consider including is any news on the day-after Brunch.

6. Rehearsal Dinner/Welcome Reception- when planning a destination, many of our clients struggle with their rehearsal dinner planning as they know many of their guests have traveled large distances and many arrive the day before the wedding. Some clients decide to continue the tradition of their rehearsal dinner including only the members of the wedding party and their immediate families. Others decide to include out-of-towners after dinner for welcome drinks, and sometimes we create events where the entire guest list is invited to a welcome dinner the evening before the wedding. A great idea to include everyone, be prepared to adjust your budget according as feeding 80-100% of your guests is much more costly than your wedding party alone.

In the end, many of these considerations apply to a non-destination wedding, so plan in advance, keep your guests experience in mind, and happy planning!

KP

Thursday, June 3, 2010

Out of Town Accommodations

42-15655163


When we get hired to plan a wedding, 95% of our clients are planning a New England destination wedding. Because of this statistic, one of the first things we do for our clients is find them overnight accommodations for their guests. The quicker you can take care of this to-do item, the better, since there are many factors affected by these decisions. Here are a few things to think about when reserving your accommodations for your out of town guests:

1. ROOM BLOCKS- some hotels will offer room blocks that you can reserve and offer your guests. Often times there is a reduced room rate with your block, but that's not always the case. In the height of the summer season in New England, many hotels will offer you the courtesy of reserving rooms because they will otherwise sell out. Some hotels will require attrition on the room block which means you are required to fill a certain % of the total block, often times it's around 80%, and if you don't, you are responsible for paying for the rest of the rooms. Make sure you check in with your hotel to see how your block is filling up. Many hotels start their room blocks at 10 rooms and then will continue to add to it as you fill the rooms. If and when you reserve your room blocks, make sure you include the name of the block on your Save The Date or your wedding invitation to make it easier on your guests.

2. PRICING- we always suggest trying to get room blocks at three hotels around your wedding location that reflect three different price points to help your guests. Some people at your wedding might have just graduated college and don't have the means to spend $300/night for a hotel room. Some of your parents guests might want to make a mini-vacation out of it and splurge on their accommodations for the wedding. No matter the reason, try to find three different price points to make it as convenient as possible for your guests. One other thought, especially if you can't get a reduced rate for your room blocks, is to ask about a AAA or AARP rate. This can often be up to $10.00 cheaper than the going rate for hotel rooms.

3. STATIONERY- please try to take care of your guest accommodations as soon as you can in order to include this information in your Save the Date and/or Invitations. We suggest including the hotel name, address, phone, website, room block information and pricing if you have that information. Also consider including whether or not there is a 2-night minimum.

4. WELCOME BASKETS- if you'd like to include welcome baskets or welcome itineraries for your guests you will need to know where everyone is staying. Getting a room block at a hotel is the easiest way to keep track of your guests, since everyone will be in the same area. For the hotels that don't offer blocks, you will have to contact your guests directly to find out where they're staying. Write an email asking people to let you know where they're staying, include some sort of check box on your wedding website, or go old school and make a few phone calls.


Maine welcome bakset

5. TRANSPORTATION- similar to your welcome basket situation, you need to know how many guests are staying at each hotel in order to reserve the appropriate vehicles.


shuttle bus

Getting this item checked off your list soon than later will help keep you organized and will help get your other vendors involved the information they need. Good luck with your planning and have a happy wedding!

KP


Monday, April 5, 2010

Amy and Sean Get Married

Hi everyone! We are back in action here at the KPW blog. my Kate Parker Wedding has taken up a lot of our time (in a good way) If you want to check out our new online wedding resource, feel free to visit my Kate Parker Wedding! We are hoping to post once a week here on KPW to keep things going.For our first time back in a while, we thought we would post about one of the weddings we are planning in June!

This year we are planning a wedding for a fabulous couple who's style is rustic meets vintage meets something fun and new. We were so in love with their amazing stationery designs that we decided to have some fun! We took a mini photo shoot of the invitations, map, announcement, envelope, and also their flowers (minus the craspedia) to show off their amazing wedding design and awesome style.

This wedding has so many details, but in the best way there could be. There is baking twine wrapped around the invitations with two owls threaded through the twine and perched on the outside of the envelope. We have decided to continue the twine and owl design throughout the wedding and onto the napkins. By wrapping the napkins with baking twine and beading the owls through, we can keep the wedding design flowing, from invites to the reception! The couple also had the coolest stamp designed for them which is two little squirrels holding a heart. How awesome! The squirrel theme is quite venue appropriate since the couple is getting married at Rockywold Deephaven Camp in New Hampshire.

The color scheme for this wedding is something new, different, and very cool. The couple chose an aqua-ish blue, red and a perfect shade of yellow for their invitations. For the centerpieces we designed a terra cotta flower pot and found the perfect shade of blue to paint over it in order to match the wedding invitation colors. We then glazed it to get a nice, finished look. Another aspect of the table scape is the cool fabric that the couple picked out to go under the centerpieces and over the off white table linen. The floral and polka dot designs of these fabrics are in great shades of red, yellow, green, and and blue. A perfect mis-match of patterns that will go great with the wooden aspects of Rockywold.

We are also very excited and proud to say that one of our myKPW photographers, Studio Nouveau, is shooting this wedding!


Amy and Sean get Married

Here is a photograph of the inside of the invitation. The map of Rockywold and the directions from North or South are a great addition to the invites that help guests out when planning how they are getting to the wedding.

Amy and Sean get Married

Here is a Save-The-Date for Amy and Sean. Notice the baking twine at the top!


Amy and Sean get Married

Here is the full set of the invitation. The pocket holds the invitation filled with info about the wedding, maps, what to wear, directions, and of course a place to RSVP. This invitation was printed on some pretty awesome paper that is made to look like tree bark. How cool!?

Amy and Sean get Married

I love love love these owls (and the squirrels in the background)! The twine wrapped around the invitation was all done by hand by the bride. What dedication. I so appreciate the creative, skilled, hands on DIY kind of bride.

Amy and Sean get Married

Hello Campers! This is the opening of the invitation, a welcome greeting from Amy and Sean, the bride and groom. You can see the little squirrel stamp at the top of the page, tying the inside of the envelope to the outside.

All of Amy and Sean's wedding stationery was designed and created by Strong Studio.

.written by allie.

Tuesday, July 21, 2009

Danielle and Matt- a details video


Check out this great video from Maple Loft! Danielle and Matt had great weather last July and we really enjoyed looking back on these details. Thanks to Claris Photography for the fabulous pictures as well! Both vendors are members of the MY KPW family!

http://www.mapleloftstudios.com/DanielleMatt/

Check out Maple Loft
Check out Claris Photography

Thursday, July 16, 2009

Calligraphy- what you need to know

We have worked with some very talented calligraphers over the past several years and have had the pleasure of meeting some fresh new faces recently as well. It made me think about how many clients actually know about calligraphy and how beautiful and affective it can be to incorporate its cost into your overall paper products budget. Today we will review where you can use a calligrapher and the costs involved. Yes, you don't have to spend any money to have someone else write everything out for you but that can take hours and hours and your time is very valuable, so you might want to consider a calligrapher!

Calligraphy: n. the art of writing beautifully

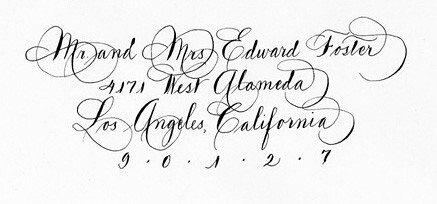
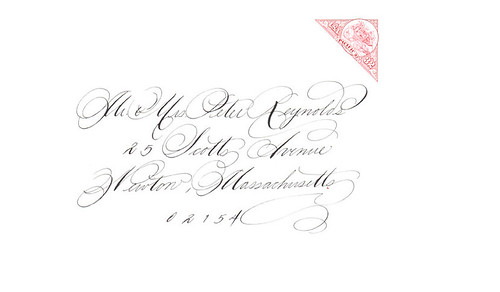
There are a few ways to calligraph using different nibs- yes that's a technical term. Depending on the type of font, a calligrapher will use a different nib to create a thinner, more flourished font or a thicker, more chiseled font. Some fonts are so thin and delicate that an ink well can't be used and a calligrapher will use an actual pen to create the lines of the font.

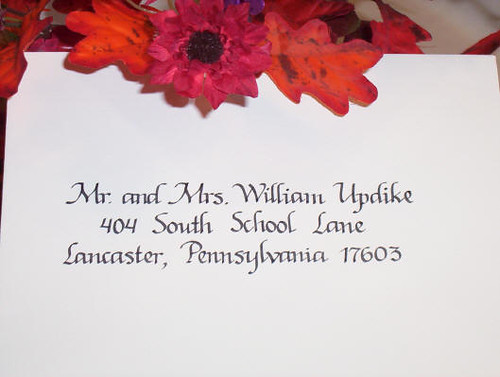
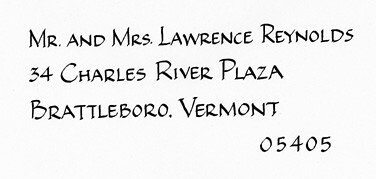
Here are some examples of calligraphy in a more chiseled font:


The above two calligraphy samples provided by Calligraphy by Jennifer


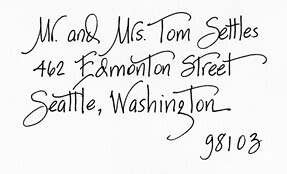
Here's an example of a thin font that Jan has created:


The above three calligraphy samples provided by Jan Boyd Calligraphy

These simpler fonts would be great for a more casual wedding reception or maybe even a rehearsal dinner invitation.

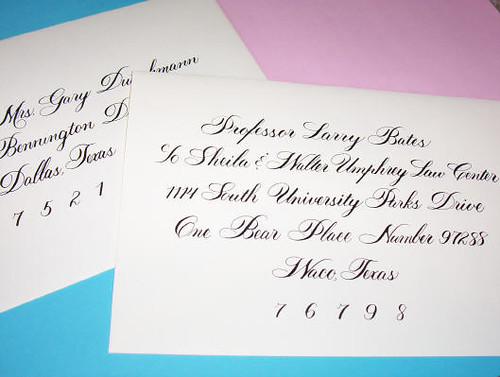
For a more traditional, formal font, take a look at these options:


The above two calligraphy samples provided by Calligraphy by Jennifer


The above two calligraphy samples provided by Jan Boyd Calligraphy


The above the calligraphy samples provided by Ted Clausen Calligraphy

You can hire a calligrapher to take care of the following items:

Addressing Save the Dates
Addressing Invitations
Custom Invitations- they create one calligraphed invitation and send your printer a printable version
Place Cards
Escort Cards
Table Numbers
Addressing Thank You Cards
Specialty Signs- well wishes containers, signature drink menus
Custom Favor Tags
Custom Programs- they create one calligraphed program and send your printer a printable version
Custom Menus- they create one calligraphed menu and send your printer a printable version

Cost for each of these items greatly depends on each calligrapher, how many years experience they have, and usually the style of font you select. Here's a ballpark of what you might expect to pay for each of the above items:

Addressing Save the Dates-$1.25-$10.00 a piece for outer envelopes
Addressing Invitations- $1.25-$10.00 for the outer envelope, $3.00-$15.00 for outer and inner envelope sets
Custom Invitations- most calligraphers will charge a single flat fee of anywhere from $50-$150.00 for this artwork
Place Cards/Escort Cards- $.75-$1.95 depending on if the calligrapher includes just the guest name or adds the table number. Also if they have to calligraph an envelope and inner table number card that will be on the higher end of the price range.
Table Numbers- $5.00-$25.00 depending if the calligraph provides the paper and the level of detail of each table number
Addressing Thank You Cards- I HIGHLY recommend having this done for you so you don't have to deal with it after your wedding. The list is the same as your wedding acceptance list so send it to your calligrapher to not deal with the hassle! $1.25-$10.00 each envelope.
Specialty Signs- $5.00-$25.00 depending on the size of each sign and how many words need to be calligraphed
Custom Favor Tags- ask your calligrapher about this, their prices will vary
Custom Programs/Menus- similar to Custom invitation artwork, plan on anywhere from $50.00-$150.00

Now on to the timing of things..... you should schedule at least 2 if not 3 weeks for your calligrapher to get your invitations completed. They usually have specific ways they like to receive your lists, but excel or word documents are fairly popular and usually okay with most calligraphers. For place cards and escort cards most calligraphers can get those completed in 2 weeks. A rush fee can be applied to most orders to get them done in less time, and figure a 10-15% charge of your total bill in order to accommodate a shorter completion period.

Calligraphy is an added expense for sure, but it can be the finishing touch to all of your design elements- from your paper products, tabletop decor and even special extras. It saves you plenty of time too as it takes hours to write out everyone's addresses. Most of you who have attempted to write out 100 addresses know that after a while your handwriting doesn't look quite as good as it did when you started your project. Some people ask a family member or friend to address everything for them as well and although that would be very generous of that person, some people are very intimidated by such a task, worrying that it won't look perfect. So after all is said and done, consider working with a calligrapher to make your life easier and make your wedding design that much more special.

Here's a list of noteworthy calligraphers we either know or have worked with in the past and we HIGHLY reccomend:

Jan Boyd Calligraphy
Ted Clausen Calligraphy
Calligraphy by Jennifer
Laura Hooper Calligraphy

Wednesday, July 15, 2009

KPW product line has been blogged about!


I am honored to share this great blog post about some of the KPW products we offer to our clients written by So Chic Events!


http://sochicevents.blogspot.com/2009/07/welcome-your-guests.html

Thanks so much Shelby for blogging about us!

Take a look at So Chic Events website when you have a chance at: www.sochicevents.com

Meet the ladies of KPW


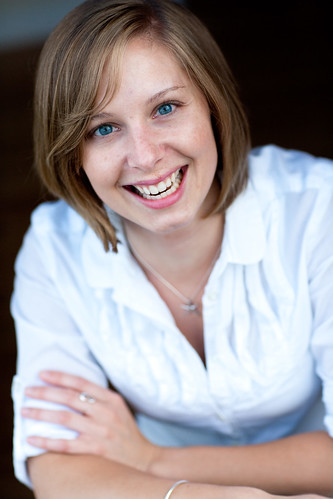
I thought it would be fun to show you who you talk to when you call the KPW office. Kate Mann has been with KPW for a few years now and we just welcomed Liz Sullivan to the KPW family. Lola, VP of operations, has been on board for almost 4 years now. Sometimes it's nice to put a face to a name. Thank you to Emilie Sommer of Emilie Inc. Photography for taking such fabulous photos!

Kate Mann, wedding planner, graphic designer, welcome basket customer service


Liz Sullivan, wedding planner, MY KPW customer service


Lola Parker, VP of operations


Kate Parker Weddings

Kate Parker Flowers

MY Kate Parker Wedding

Wednesday, July 1, 2009
How to make an Out of Town Welcome Basket- a tutorial

We have expanded the Kate Parker Weddings brand to include a number of products, most notably our custom Out of Town Welcome Baskets. We have been blogged numerous times showing off our products and occasionally someone comments on how expensive our baskets cost. While OOT welcome baskets are often a DIY project for many brides, I wanted to show you our process so you get a better sense of how involved they can be from the ordering through shipping of each individual basket. We will ship to as many hotels as a client requests, contacting each hotel in advance to let them know our baskets are coming. In addition we send each box with a list of guests as to minimize any confusion. I hope this tutorial gives inspiration for the DIY brides and maybe even some expert secrets and tips of the trade! Enjoy.


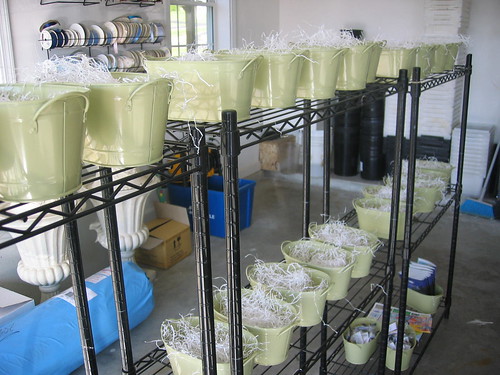
The first step is laying out all of the containers and filling them with whatever filler the client has requested. We have a number of containers available on our website but are always open to finding the perfect item if a client is looking for something a little different. The same goes with our filler- paper shred, crinkle paper, tissue paper, natural burlap...you name it, we can find it!


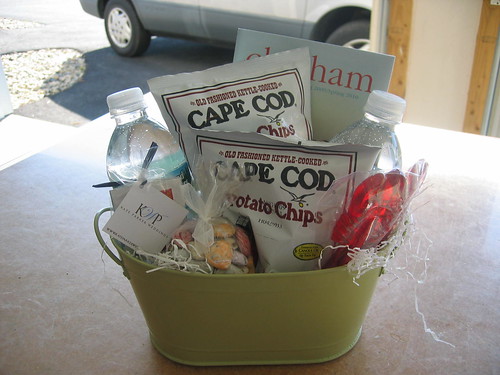
Next we add the heaviest of the items, usually the waters. We use local water companies within New England and then we use Fiji waters for the rest of the country. Sometimes we have them next to one another, other times we will separate them to make room for other larger items.


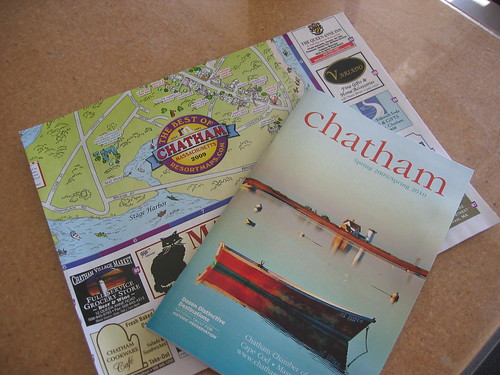
For this Chatham, MA basket, we wanted to include a Cape Cod travel guide as well as a map of the area for each guest. We usually get this from the local Chamber of Commerce and often times we create custom welcome letters and maps for our clients.


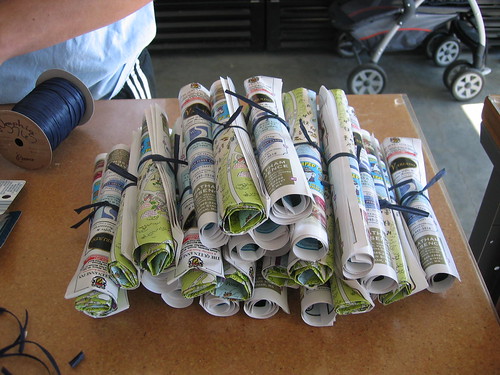
Because this basket wasn't very tall we needed to roll up the map and local guide. It ended up being cuter this way!


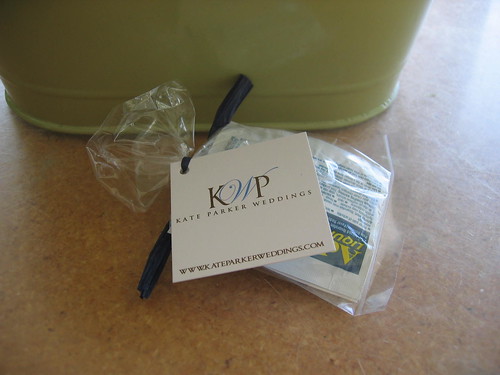
A KPW welcome basket isn't complete without our signature medicine kit which includes Tylenol, Advil, and Pepto Bismol. You never know how traveling will treat your guests.


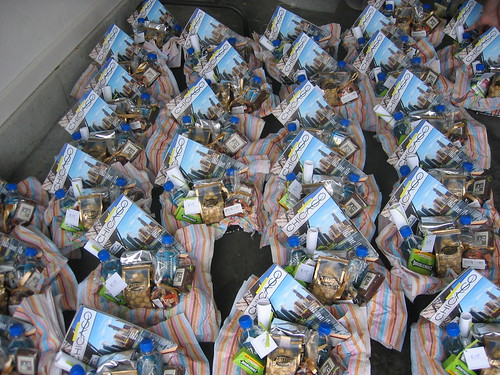
Here is a photo of a completed basket. We like to include the following in each of our baskets: A sweet snack, a salty snack, 2 waters, a medicine kit, chamber of commerce guides and map, and an adorable container with filler. Some clients like to add additional items, some like a few less.


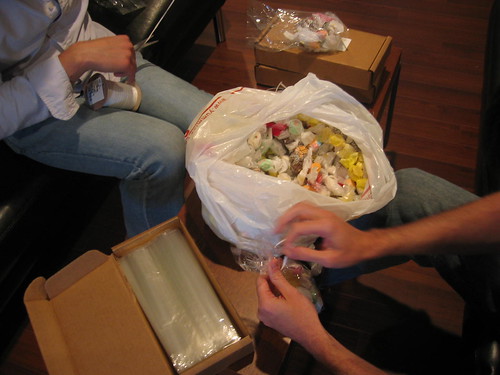
Sometimes we have to put items together in order to accommodate the size of the basket. Here we are creating bags of salt water taffy.


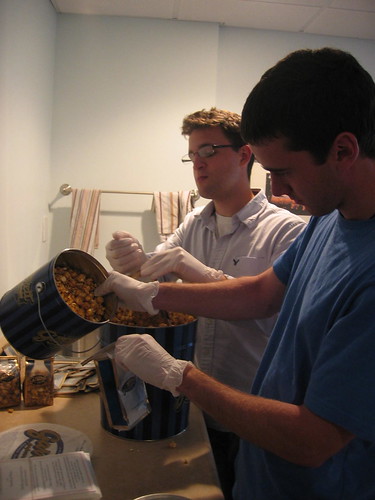
Here we are making small 2 cup bags of the BEST caramel popcorn in the world, Garrett's Popcorn in Chicago... it is so fabulous!


When the baskets are completed they are lined up to check for symmetry and to double check all the contents are included in each basket.


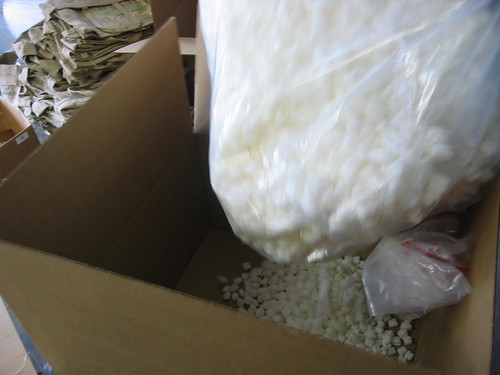
Packing baskets is not an easy thing, since we have to make sure the contents don't move or get destroyed in transit... we like to start with a large 30"x30" box filled with some biodegradable packing peanuts.


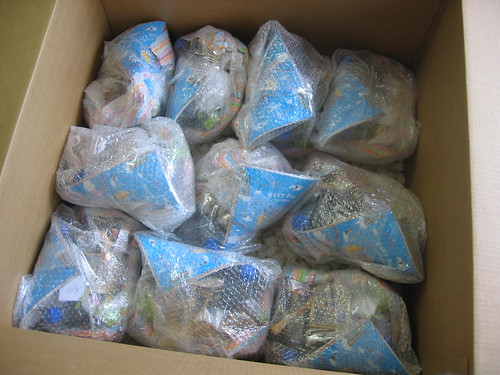
Each basket is wrapped in bubble. We don't like to use cellophane for each basket- it's a waste of money and it's not easy for your guests to deal with.


Once the baskets are placed in the box they are covered in more peanuts and bubble wrap, ensuring their safe delivery to each hotel.